 |
| Desk with breadboard ends fitted |
The plain end of a tongue and groove desktop looks like this:
 |
| Plain end of tongue and groove construction |
Even without lumber marks this doesn't look very nice.
I begin by cutting the end boards about 1" longer than the desktop depth. The process of grooving the boards makes the groove flare slightly outwards at one end. The extra length lets me cut the flared part off - otherwise there would be a visible gap where the tongue and groove meet.
The next step is cutting grooves in the edges of the boards that fit on each end.
 |
| Groove cut in breadboard end |
 | |
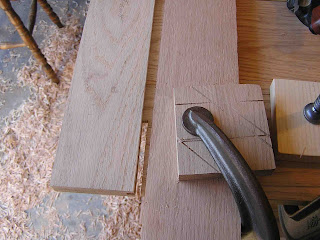
| Chiseling mortise ends |
 |
| Routing mortises to depth |
 |
| Cutting the tenons |
I use a clamped piece of scrap lined up with the tenon shoulder as a double check that the filister plane doesn't creep over the shoulder line.
The depth of this cut is easy to check because the tenons will be the same depth as the tongues that join the boards together. When the grooved edge has been cut through to expose the tongue all the way to the shoulder of the tenon, the depth should be correct.
The tenon at each edge is shortened to the depth of the groove 3 1/4" in from the edge. The breadboard end mortises were cut 3" in from the ends of the breadboard, so there will be 1/2" clearance to allow for wood movement in the top.
 |
| Fitting the breadboard end |
You can use a glued dowel from the underside to secure the breadboard end. If you want to have the possibility of removing the breadboard end, for example to make finishing easier, the joint can be secured from underneath with a figure of 8 fastener and a couple of screws. As the fastener has countersinking on alternate sides, I countersink one hole from the other side so both flathead screws sit flush.
Well written; shows the marks of a craftsman. I notice that the author uses antique tools.
ReplyDelete