

When you make things from wood, it is assumed you can make anything, and it feels like you can.
An old friend wanted an 81" long by 13" wide piece of driftwood turned into a bench for flower pots. "Nothing easier," I said, (never having built rustic furniture before) "I'll draw some sketches."
I brought a few sketches for her to see, then she showed me a tree that had fallen in the wind "... that might do for the legs." As I don't have a chain saw she would be getting a relative to cut the tree into 18" lengths.
Five minutes later I had a new sketch that had three bundles of tree trunk sections to act as legs:
 |
| Bench drawing |
A couple of months later the fallen tree still hadn't been cut. Another friend 50 miles away, who had a chain saw, had some cherry timber that had fallen, was straight, and had attractive bark. We spent a pleasant afternoon cutting and loading the wood so I could make up three sets of four logs as legs.
With the wood in the shop I worked out a way to put the log legs together that so the bench could be assembled on site, but the fastenings wouldn't be obvious. A visit to the local home center provided me with holed strips of galvanized mild steel, 24" lengths of 3/8" threaded rod, 6 jam nuts, and 3 fender washers.
I cut the steel strips into suitable lengths:
 |
| Holed mild steel strips |
 |
| Logs clamped together and strips secured for marking out |
The ends of the logs were roughly square, but the clusters needed to be squared when they were assembled. To do this and to prevent contact between the metal and the ground I cut notches 1 1/4" deep for the cross pieces at each end of the clusters:
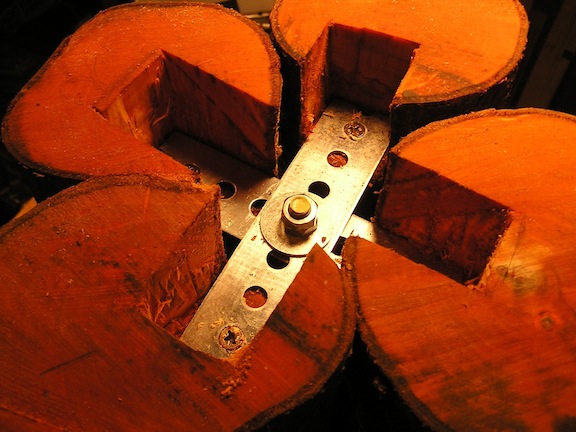 |
| Notches with steel strips screwed in place, and threaded rod in place |
This meant chiseling out 24 notches. It was wet wood, and it was heavy going. With the notches cut and the legs strapped together I used a home-made drawbore pin to center the steel strips and screwed them into position. Once the three leg clusters were connected I sawed the ends square.
I planed the bark flat for a better connection where the legs would contact it, then lined up the legs with a straight 2 by 4 and adjusted the leg lengths until the outer two were very slightly longer than the center one to prevent end to end rocking.
Initially I was going to screw the threaded rods straight into the driftwood, but the weight of the legs (about 100 pounds each) would have pulled out the threads. To fix this I screwed three threaded inserts from a hardware store into the driftwood to hold the threaded rods, that were then screwed in finger tight.

With all three legs in position I carefully rolled the bench onto the drive. The bench was built AND it looks like the drawing. Phew!
 |
| Completed bench |
No comments:
Post a Comment