Saturday 26 April 2014

Brass Typewriter Spool Covers Part 4


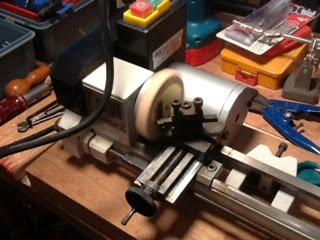
Plan B worked well.  The item displayed above is made from a brass disk I turned on the lathe, a 1/4" brass washer bored out to 9/32", a 9/32" brass tube, and the top sawn off the Lee Valley small brass knob.

Originally my plan was to solder these together, but I chickened out and used super glue after an early version looked a bit ham fisted:

If I painted the disk black, like the original Remington supplied, I could have used the soldered one, but I wanted to have all the brass showing.

Compare this with the finished pair that I super glued together:

In position on the typewriter below is one of these brass spool covers along with the plastic spool cover held on with transparent plastic tubing together on the machine.

The plastic one and the brass one each do exactly the same job as the original would have done, but I think the brass version looks better with the elegant Art Deco style of the machine.

By shear luck, as I hadn't planned it, the carriage return lever clears the top of the left hand spool cover! 

Part 1 Part 2 Part 3

Friday 25 April 2014

Typewriter (or Laptop) Stand Part 2

After gluing the other side of the column in place, working out where the mortices go in the base comes next.

The base is a piece of dimensional 2 by 12 planed flat.  45 degree pencil lines from each corner intersect to give points to draw center lines side to side and end to end, without measuring.
These lines help align the tenons on the column with the base.

When you're happy with the placing, draw a line on the base around the end of each tenon.  To make sure the column goes with the base the right way round, draw the tip of a triangle on the edge of one oak tenon, with its bottom drawn on the hem/fir base, as in the photo above on the right hand tenon.

The marks round the tenon ends are carried over to the bottom of the base with a square, so the mortices can be chopped through from both sides of the base, meeting more or less in the right place.

Then knock the column through the base.   In this case it was such a good fit I didn't need to use glue, but that's not always how these things work out!

The next trick is to add a bit of life, and therefore interest to the joint.  Using an offcut of the same oak I cut two right angle triangles, carved a curve into each hypotenuse, and glued them to the front and back of the column at the base.  These are sanded so they look like they are part of the original column.

The light coloured part on the left hand side of the top is a shim to get the column level so I can add the top.  It's important that the column top is flat to get a good support for the platform for the typewriter.

More to come, bye for now.


Thursday 24 April 2014

Typewriter (or Laptop) Stand Part 1

While I'm working out the spool covers for the typewriter, I've also been working on a stand for it.

This will be a single column pedestal stand, following the line of the back-saving bedroom bookstands I made for my wife and I.  Originally they were cat stands with carpet on top, but our cats studiously ignored them.  These were both intended to be prototypes, but have worked so well I've left them as they are.

As with most things I started with a mockup of the typewriter stand, putting the typewriter on folding table and shimming it to the right working height with different thicknesses of books.

Two 3/4" thick planks of oak, cut to length, would make the column, with tenons on one end of each to go into a base.  I ripped one down the middle.

With the other plank I used a Record plough plane to cut a 3/4" groove down the middle of each side.  I did this in two passes, using a 3/8" cutter.

When the grooves were cut I flattened the bottom of the groove with a router plane.

Now the first piece of the halved plank is gluing in one side of the ploughed plank.

To be continued. - See Part 2  Part 3


Brass Typewriter Spool Covers Part 3

The brass knobs arrived from Lee Valley Tools and look beautiful.  This is what I hoped the spool covers would look like when the disks I turned on the lathe were fitted with the knobs:

Unfortunately the base of each knob is not thick enough to be drilled through safely with a 1/4" HSS drill bit needed to fit the spool spindles of the typewriter:

Plan B involves using 9/32" brass tubing and a brass washer to make a new base for each knob, and cutting the top off the knob and fitting it to the top of the tubing, so I'll see how that goes.

Part 1 Part 2 Part 4

Friday 18 April 2014

Brass Typewriter Spool Covers Part 2

The reason for the brass spool covers is the original Remington design.  In the diagram from the Operating Manual below you can see that spool covers, numbers 6 and 26, are elegant.  I want to make covers that are similar, but in brass.

Each spool has a 1/4" post in the middle that the knob of the spool cover fits.


There's a good picture of what theNoiseless 7 looks like at this link: http://site.xavier.edu/polt/typewriters/remingtonnoiseless7.jpg

I think you would agree the original spool covers look good.

I'm guessing that the 1/2" by 1/2" small brass knobs from Lee Valley will fit if I drill them to 1/4", but it could be that they are smaller in diameter at the waist.  In that case I have a backup plan.  With 9/32nd brass tubing ( internal diameter 1/4" ), and washers drilled out to fit the tube, I can make up knobs to fit from scratch.

Part 1 Part 3 Part 4

Thursday 17 April 2014

Brass Typewriter Spool Covers


I recently bought a Remington Noiseless 7 typewriter.  "Why?" you may ask?  Because I miss typewriters, and this is a beauty, and because my wife, Christine, just bought an IBM Selectric II, her favorite machine.  I learned to type on a heavy Underwood in my dad's workshop in the 1960s, but the Remington is much lighter and elegant, and it's fun to use.  I'm also hoping to resume my output of articles.

Already there's a need for two typewriter stands and covers, and I'm thinking about designs for those. But ahead of that, there's a few things that need more immediate attention.  Originally the Remington was issued with two spool covers.  This machine has a a couple of plastic discs held on with bits of 1/4 " plastic tubing.

I bought some 2" wide 18 gauge brass strip from Ace Hardware to make brass replacements.  Two 1/2" by 1/2" brass knobs are on their way from Lee Valley Tools.

In the pictures below you'll see how two squares of brass can be changed into two spool covers, with a block of wood, some 1/2" screws, and a small lathe. More to follow.

Two x 2" squares of brass being screwed to block of wood (tenon cheek offcut):

Lathe wheel screwed to the back of the wood block:

Lathe wheel screwed onto boss:

Cutting a couple of disks:

...and here are the cover disks:

Part 2 Part 3 Part 4